The technique that makes it possible to see colour and shape in our night sky with a camera but not with our own eyes.
I use PixInsight (version 1.8.9-3) for all my post imaging processing of dark sky objects and this is how I do it:
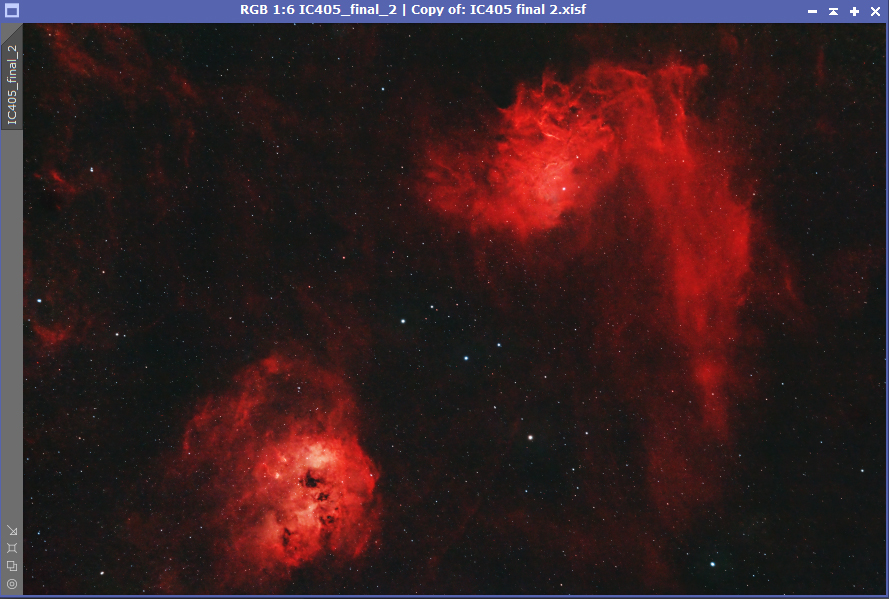
The example workflow uses images of IC405 Flaming Star and IC410 Tadpoles taken with a Canon EOS 1300D camera with a Optolong EnHance filter. The telescope was a Horizon 60ED and the mount an Explore Scientific iEXOS 100. I took 136 images of 180 seconds, ISO 1600.
Step 1 – Individual image check
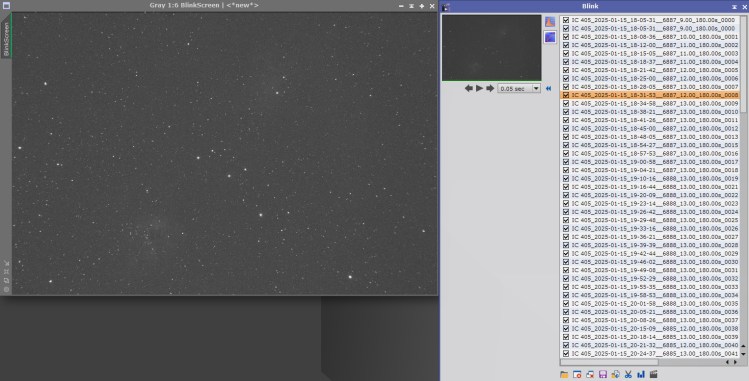
I check over the individual images to make sure there is nothing seriously wrong with any individual image – such as significant cloud cover has meant guiding has been lost and there are no stars or the normally round stars have trails.
I use PixInsight Blink to do this quick check (Process – Blink) and delete any seriously poor images involving stars that show trails or movement in the image. I personally don’t worry to much about the quality of the image in the belief that the stacking process I use will mainly sort this out.
Step 2 – Stacking
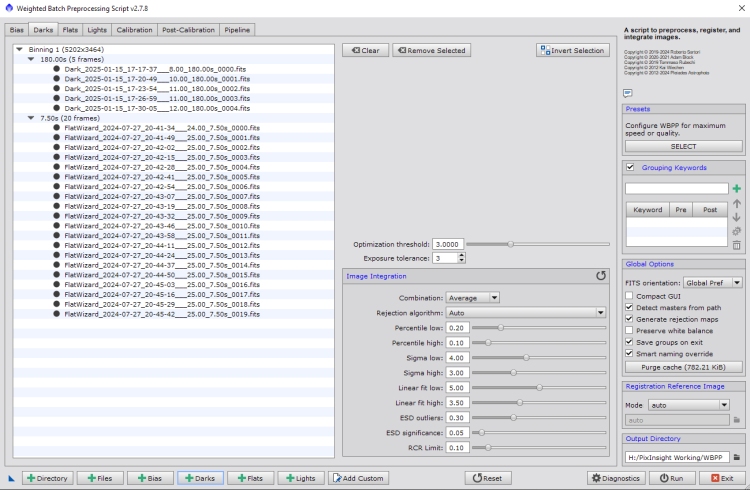
I use PixInsight WBPP (Scripts – Batch Processing – Weighted Batch Pre Processing) to stack my individual images.

The individual images are called Lights and I would then add the individual images into this folder. I normally use default settings. .
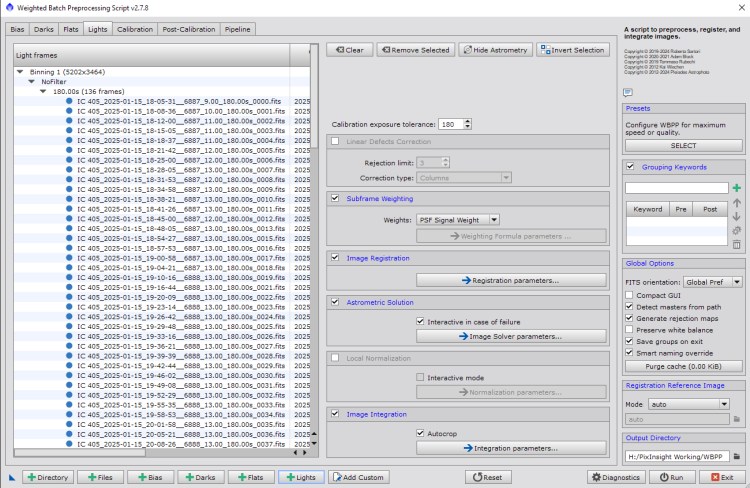
At a number of points during the stacking when using WBPP there will be a requirement to be able to know the exact coordinates of the image in the sky, the focal length of the telescope used and camera pixel size. If this data has not been recorded in the individual image data header file (e.g. when using a DSLR) then the Astronomical Solution button is used to select and complete this data.

At this point you could just click the Run button and the stacking would be processed.
This might not produce the best image possible as a camera used for long exposures amplifies electronic noise, there may be evidence of thermal noise and there may be dust motes on the lenses, filters and on the sensor that all show up in a stacked image. Camera design, such as cooling, can reduce or eliminate some of these issues, but not all. However, there are techniques available using calibration frames that can also mitigate these issues.
I use 3 types of calibration frames:
Dark Frames – a set of images taken at the same exposure time, settings and temperature as the lights but with the lens cap on. This produces a baseline for noise. I use a minimum 15 minutes imaging so for 180 sec lights I would have 5 x 180 sec darks.
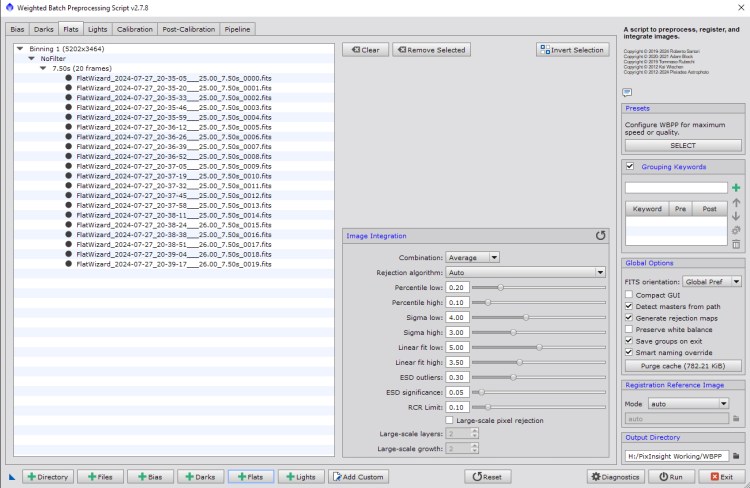
Flat Frames – a set of images taken with the same filter as the lights and with a uniform light source and an exposure time that is sufficient to create an image to show the base line vignetting of the camera set up and any dust spots. I generally would have 20 flats.
Dark Flat Frames – a set of images using the same settings as the flats but with the lens cap on. I would generally have 20 dark flats.
Unless using a cooled camera I usually take darks for every imaging session and use a set of flats and dark flats for as long as I don’t dismantle or change the camera and telescope set up in any way.
The individual flat frames are copied into the flat folder. I normally use default settings.
The individual dark flat frames are copied into the dark folder as well as the dark frames. I normally use default settings.
Using the tabs on the top, Select Calibration and click on the Lights entry.
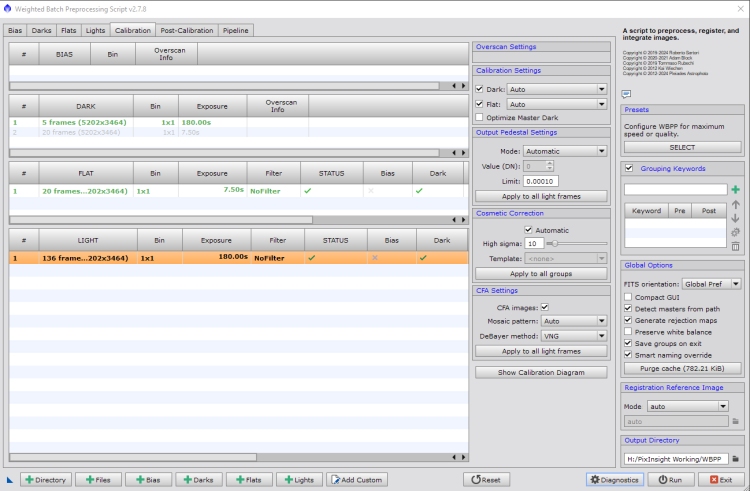
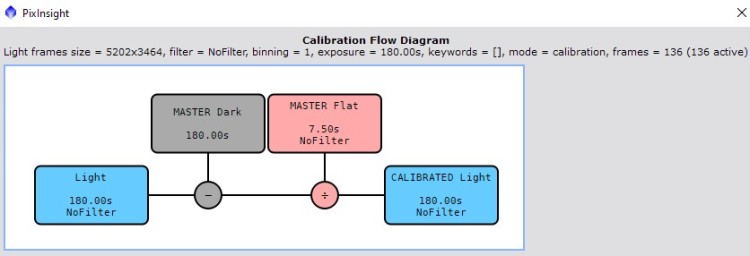
I usually check on the calibration by clicking on the Check Calibration Diagram button. This will show the calibration process that has been set up
I normally press SELECT in the Presents – Configure WBPP for maximum speed or quality and then usually press APPLY for maximum quality

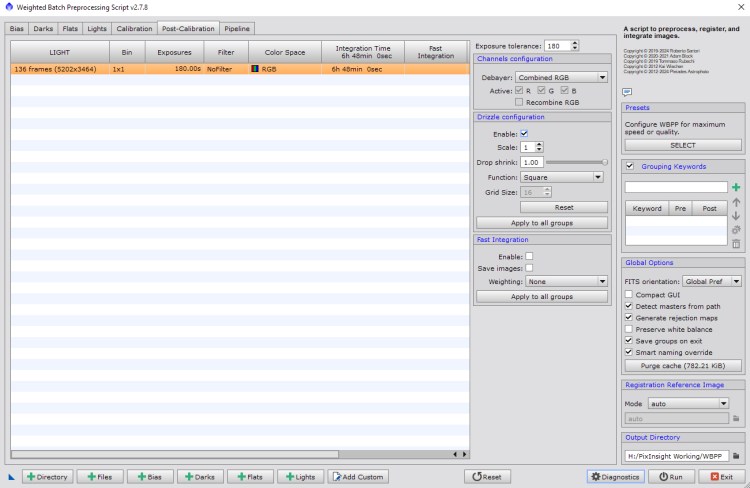
I usually Drizzle the Lights so select this using the Post Calibration tab at the top and enable Drizzle.
Using the tabs at the top, select Pipeline to check the process is what you expect.

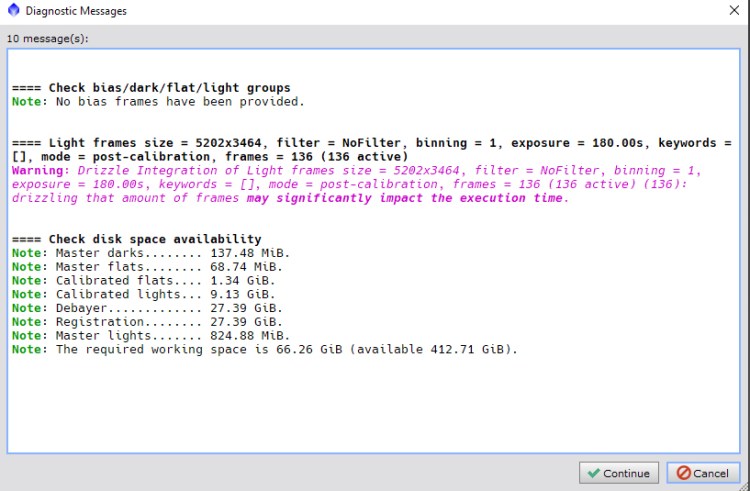
I am now ready to press the Run button to start the calibration and stacking. Ensure that an Output folder has been selected. As a final check WBPP will show a Diagnostics screen – Warnings and Errors will be shown. If there are no Errors press the Continue button.
Now wait for the calibration and stacking to process – depending upon your PC processing capability and number of images it could take from 5 minutes to even multiple hours. A screen showing progress of the Pipeline processes keeps you up to date.
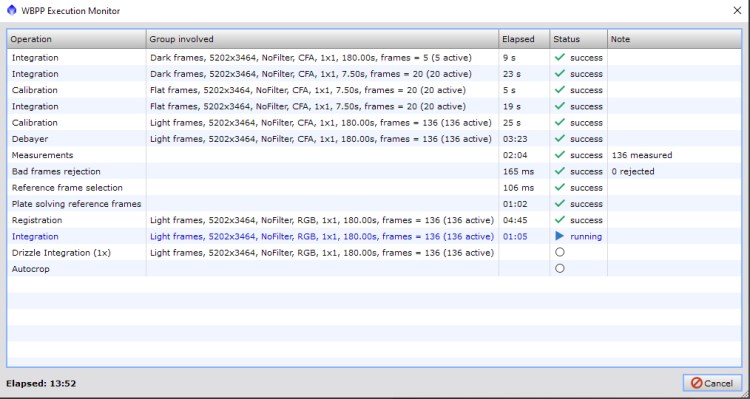
Normally, because I am allowing WBPP to check over the quality of the images then there will be a few rejections and the numbers of these are shown as you progress through the pipeline.
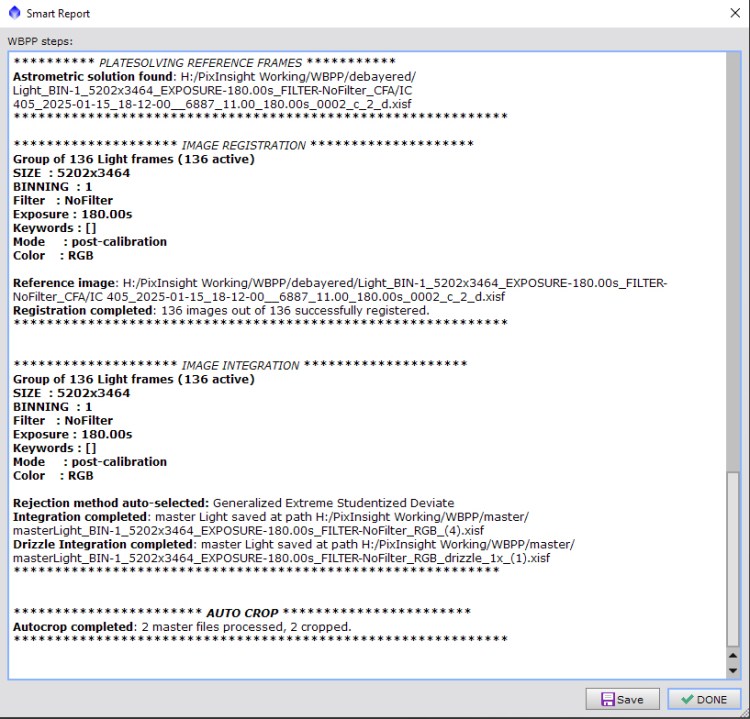
Finally, processing is complete. There is a Report of what has happened during the WBPP process
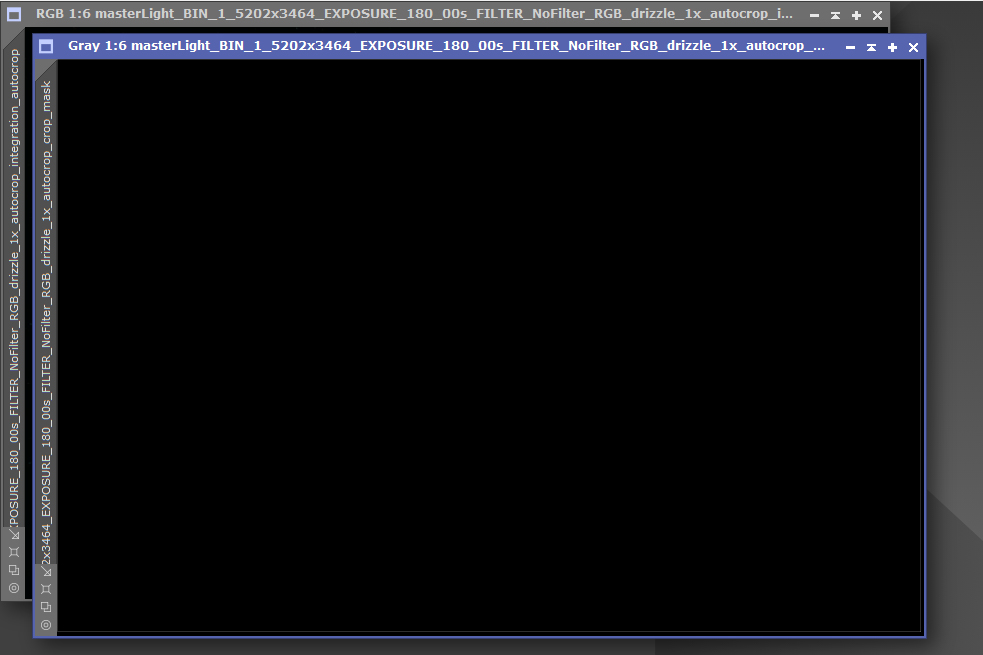
The stacked image is available in the output file you selected, in the master folder. The image you need to open in PixInsight for ongoing processing is the latest masterLight file created.
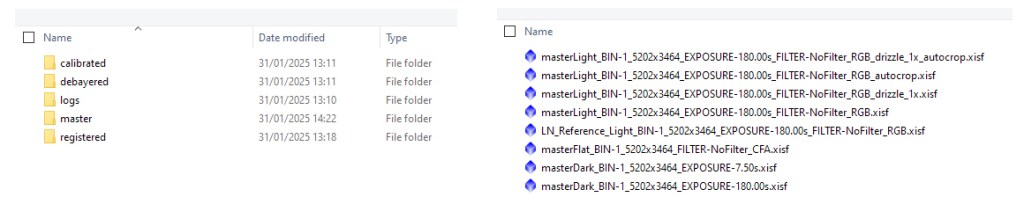
The file when opened will have 2 separate un-stretched images, the first being the image we want to use and the second the auto-cropped element of the image. I just close the second image.
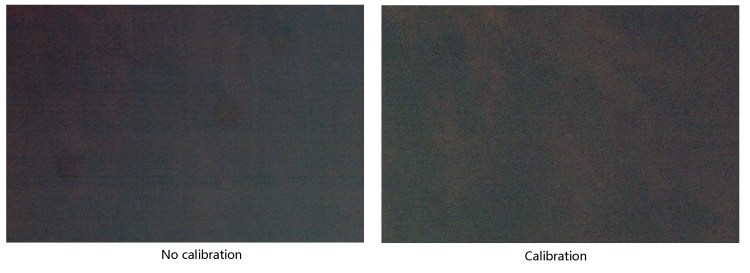
A comparison of part of the final image processed clearly shows the benefit of Calibration. The image in both instances is the same area of a masterLight file created, with nothing done other to make it starless and do a simple stretch to show the image detail. Without calibration, the dust mote dark circles and the electronic noise is very clear.
The workflow I use for ongoing linear processing and stretching has evolved as new scripts and updates to PixInsight become available. This is my current workflow and has worked for me over the last 6 months or so.
The following additional scripts and processes are required in addition to the inbuilt processes of PixInsight:
- BlurXTerminator
- NoiseXTerminator
- StarXTerminator
- Find Background Preview
- Generalized Hyperbolic Stretch (GHS)
- Star Stretch
- Combine Images
- Stat Reduction
Step 3 – Linear Processing
Linear processing is the work-flow I use to correct the image to get the best possible result prior to stretching.
Before stretching there is nothing to see as the image is mainly a black or near black dark sky and that is all you can really see. To get round this the Screen Transfer Function in PixInsight does a stretch for screen use only so you can check the results of what you are doing, but it does not actually apply the stretch to the file data itself.
Open masterLight
I start by opening the masterLight produced by WBPP using File – Open a Copy.
The file when opened will have 2 separate images if you have used Auto-crop. The first being the final auto-cropped image and the second the auto-cropped element of the image. I just close the second image.
I always select File – Open a Copy and use File – Save As to rename the file in the folder I am using as a working folder. This initial file will be saved as ObjectName_WBPP.xisf.
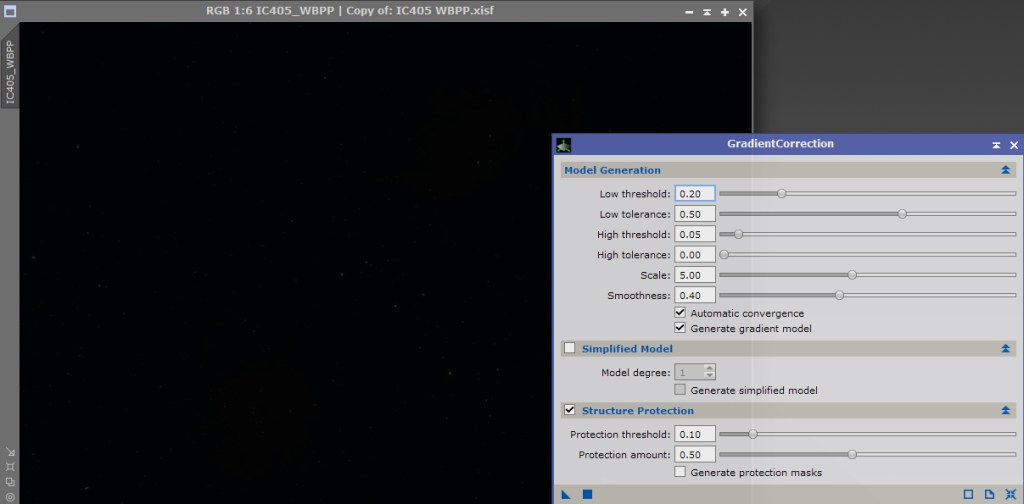
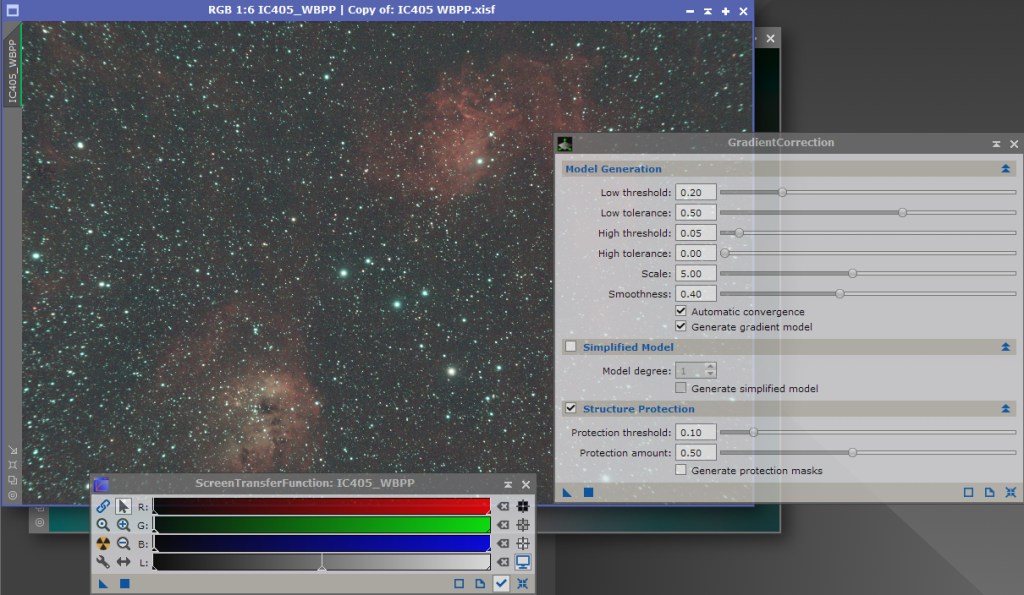
Gradient Correction
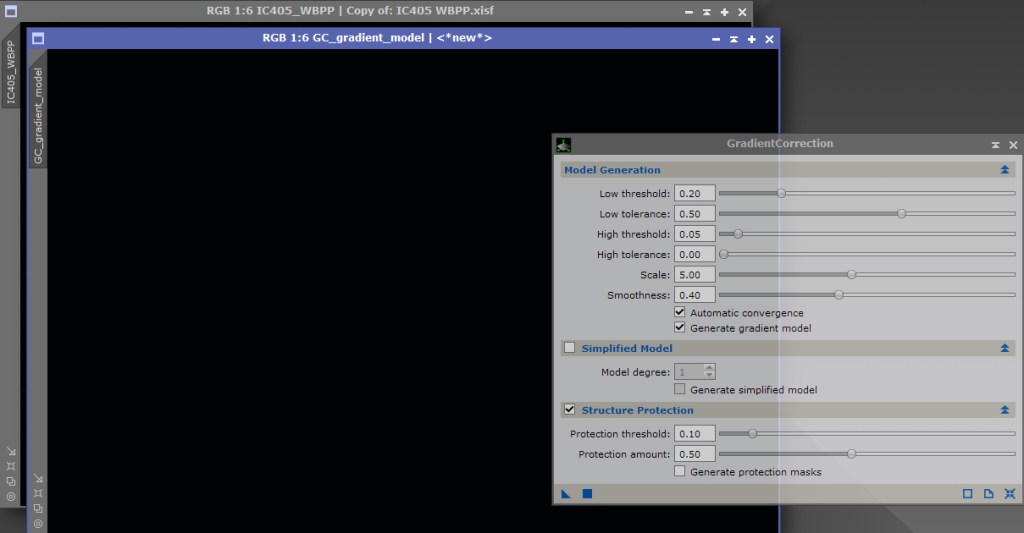
My first step is Gradient Correction (PROCESS – GradientCorrection) and is applied to the ObjectName_WBPP.xisf file, generally using defaults and ticking Automatic Convergence and Gradient Model. The latter enables you to see the extent of the gradient correction
The images remain as linear.
I then open a new Screen Transfer Function and use Auto-Stretch to get a current view of the images.
I then close the gradient_model image
BlurXTerminator (Correct Only)
I then open BlurXTerminator.
At this stage I would tick the Correct only box and apply to the GradXpert processed image.
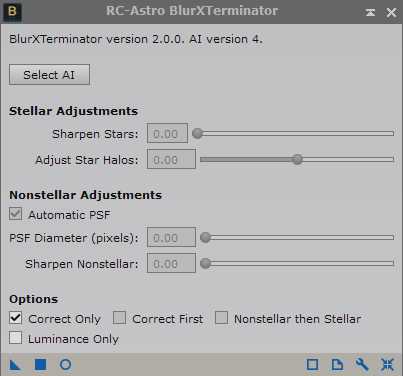
Note: there is a view that this step in no longer required so after Gradient Reduction you would go straight to Colour Calibration.
Colour Calibration
Close BlurXTerminator if used.
I would use Find Backround to preview the best background for colour calibration.

I would do a Colour Calibration using the PixInsight’s SPCC (Spectrophometry-based Color Calibration) Process
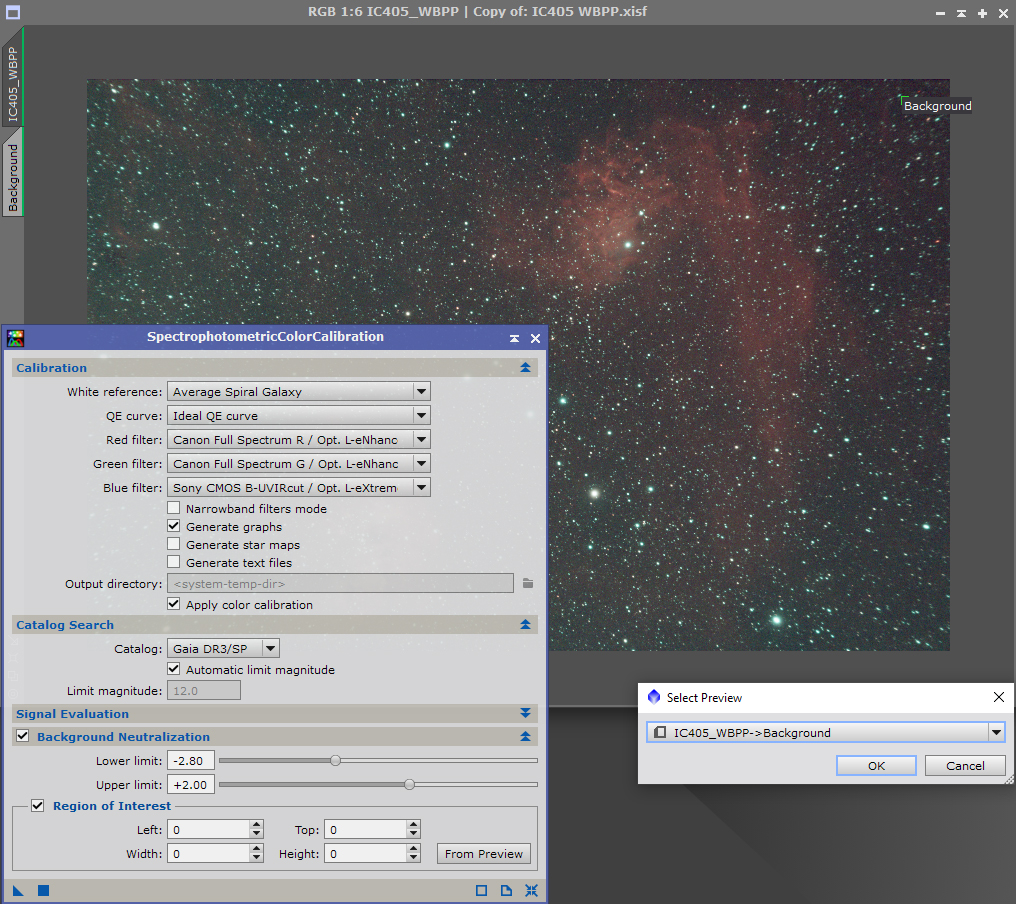
The only changes to the default screen for SPCC I use are to select the filters applicable to the camera I have used, if they are suitable, and to select a Region of Interest from the Preview and then using the Preview determined by FindBackground. Apply to the image.
SPCC will produce some graphs after processing.
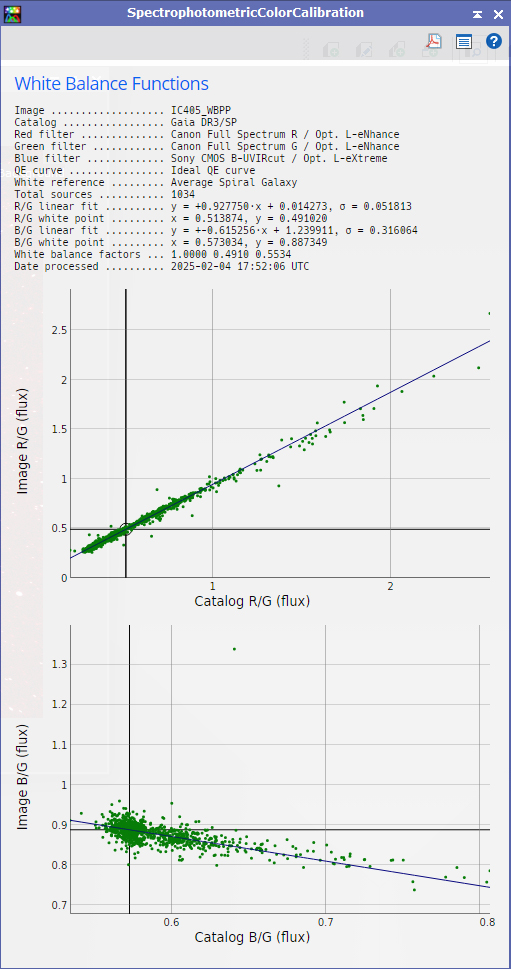
Close the graph, close the preview.
It is important to disable the Screen Transfer Function (F12) that is applied to this image as this stretch will not be representative of the image after the SPCC changes.
I then open a new Screen Transfer Function and click Auto-Stretch to get a current view of the image, the file data however remaining as linear.

Star Improvement and Sharpening
I now use BlurXterminator again, but this time do not tick the Correct Only box. Normally I use the default settings.
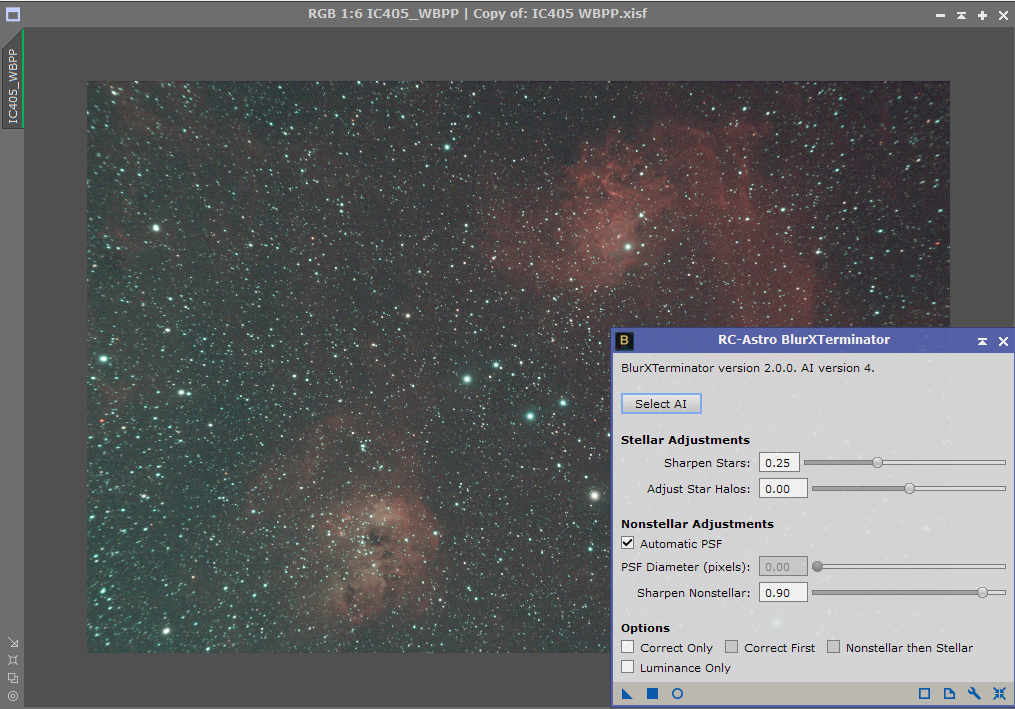
A comparison of the changes made to sharpen the image is best seen doing a before and after check – this is an enlarged view:

Noise Reduction
I now use NoiseXTrerminator, normally default settings.
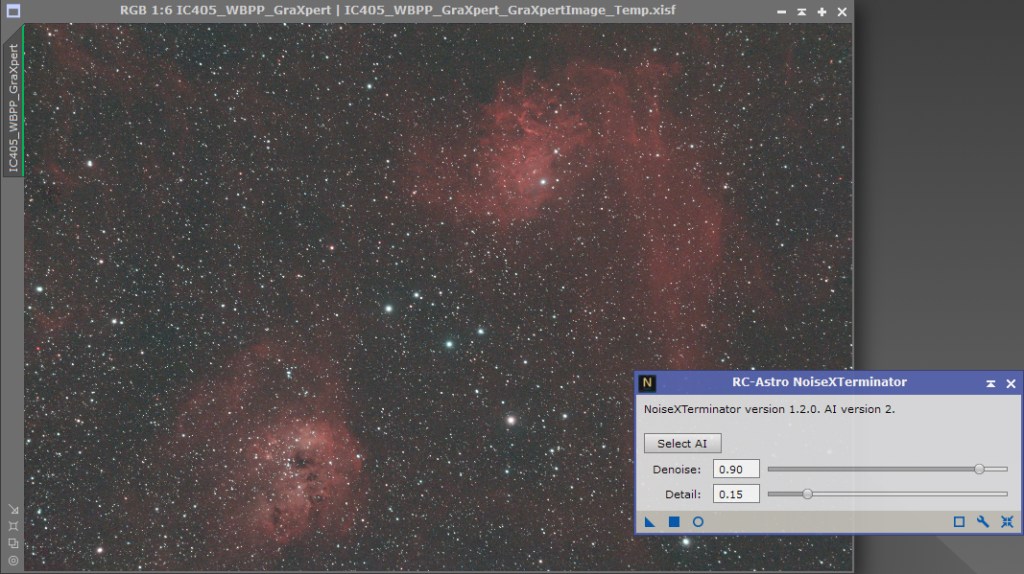
An enlarged comparison shows the effect of NoiseXTerminator

At this point I have a good linear image ready for stretching so would save it as ObjectName_linear.ixsf
Star Separation
Normally I like to stretch a starless image separately from the stars image so I will use StarXTerminator to do this separation, using default settings.

The new images are saved as ObjectName_linear_starless.xisf and ObjectMame_linear_stars.xisf
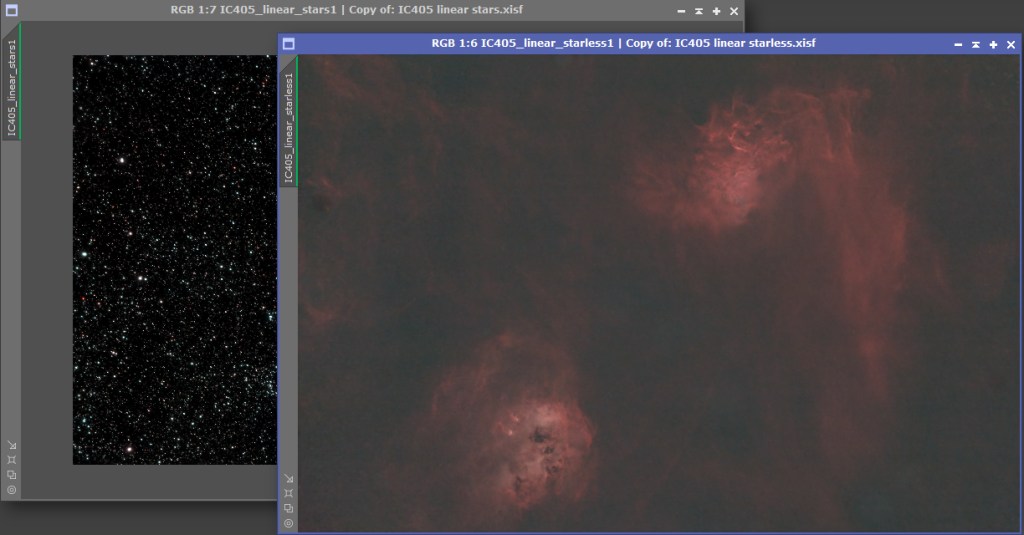
It is important to remember that these images are still linear and only show the content because STF has been used for screen viewing. At this stage I disable STFF.
Step 4 Stretching
Starless Stretch
The starless image is stretched first, and I generally use GHS (Generalised Hyperbolic Stretching).
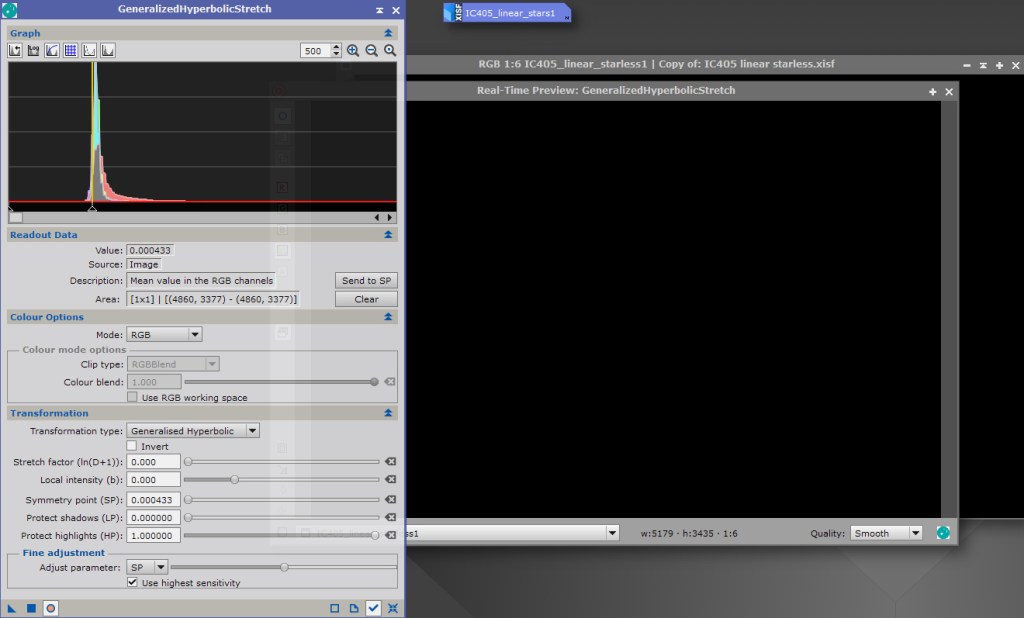
The first step is to use zoom above the histogram display to see image curve and determine the Send to SP point just before the curve peak. The curve is reset, Real Time View selected and Local intensity moved up to approximately 10. The initial stretch is the done.

The number of stretches and technique used depends upon the image and will not be covered in this workflow explanation.
The image at this point is saved as ObjectName_starless.xisf
I then fine tune the GSH stretched image using Curves Transformation, mainly RGB and Saturation.
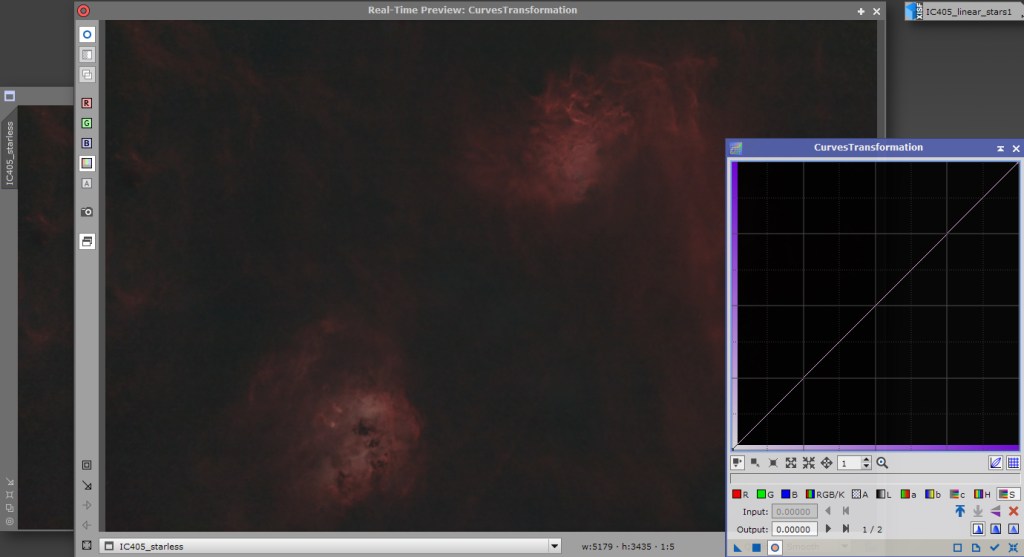
The final starless image is saved as ObjectName_starless2.xisf

Star Stretch
I use StarStretch to stretch the linear stars image

The final stars image is saved as ObjectName_stars.xisf

Creating the final image
The starless and the stars image must then be re-combined. I use SCRIPTS – Toolbox – CombineImages for this, usually the default settings.

The final image is saved as ObjectName_final.xis
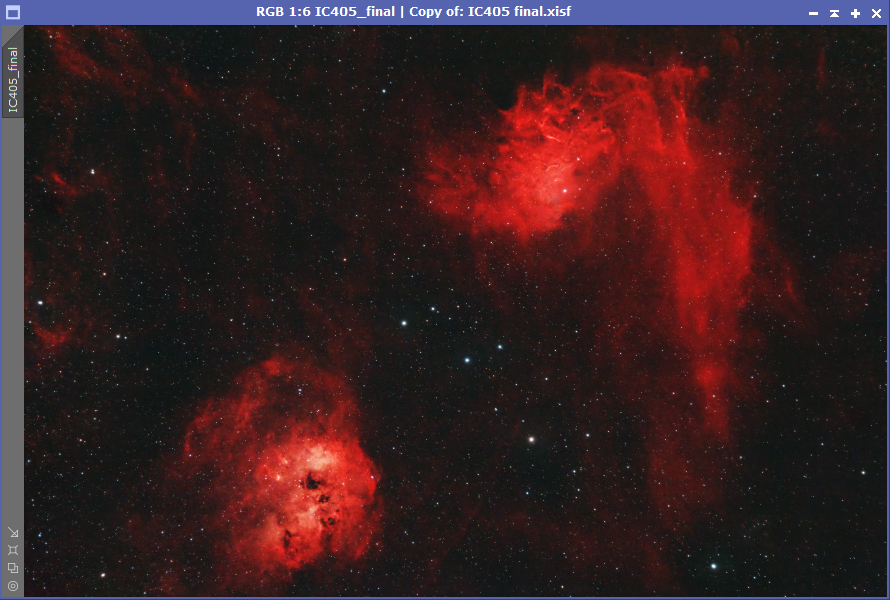
As a matter of preference I often find the stars overwhelm the image so use StarReduction to reduce the stars.

The final image